DISCLAIMER
First of all, I haven't gotten all of the functionality to work yet.
Hopefully, when a final stable 1.0 comes out, italc-master and italc-client 1.0 will just be two more packages in the Ubuntu repositories...
X.Org Module: record
We need to add a module to /etc/X11/xorg.conf, so we'll need to superuser edit it ($ sudo gedit /etc/X11/xorg.conf), find the Section "Module" section and add the following line before the line that says EndSection:
Load "record"
Dependencies
Let's first make sure we have all the dependencies installed. This may take a while...
$ sudo apt-get install build-essential libqt4-dev qt4-dev-tools libjpeg62-dev zlib1g-dev libssl-dev libxtst-dev
Source Tarball
We now need to get the source tarball at the iTALC website. (Go to "Download", select the link under "Source code", and select the file ending in .tar.bz2, in my case, italc-1.0.0.0-rc4.tar.bz2)
When you've got the tarball downloaded, you'll need to extract it to its own folder. (Right-click and "Extract Here" works well.)
Install iTALC
Now we'll compile the source code.
Drop to a terminal, navigate to iTALC's new directory (for me, $ cd ~/italc-1.0.0.0-rc4) and run the following commands:
$ ./configure --prefix=/usr

$ make

$ sudo make install
Voila! iTALC is installed!
You're not done, yet...
Set the iTALC Client Application to run on login
This is necessary for both the teacher and student workstations.
You'll need to superuser edit /etc/gdm/Init/Default and /etc/gdm/PreSession/Default ($ sudo gedit /etc/gdm/Init/Default /etc/gdm/PreSession/Default) and add the following at the very top of both of them (just below the introductory block of comments):
killall ica

/usr/bin/ica &
The first command kill any previous ica session that's running before the second command starts a new one up. This allows iTALC to interact with the clients during the login screen as well as after the user logs in, without calling up multiple instances of the client application.
Set up authentication keys
This will allow iTALC to talk to its clients in a secure manner.
The command to create the keys is: $ sudo ica -role teacher -createkeypair
After running this command, you will have a pair of keys in your newly created /etc/italc/keys directory.
/etc/italc/keys/private should be readable only to the accounts that should have access to run italc, and should only exist on the computers that will be used to run iTALC. Here that would be the "teacher" and "administrator" accounts on the teachers' workstations. See below for details on accomplishing this./etc/italc/keys/public should be readable to all, which it is by default, and should exist on every workstation.
One way to make the /etc/italc/keys/private directory readable to only the necessary accounts is as follows:
$ sudo addgroup italc

$ sudo adduser teacher italc

$ sudo adduser administrator italc

$ sudo chgrp -R italc /etc/italc/keys/private

$ sudo chmod -R o-rwx /etc/italc/keys/private
Test it locally
Let's run a quick test just to make sure everything's working ok. We're going to set up iTALC with our own local computer as a client.
iTALC needs to have the Client Application running, and a pair of keys set up in order to launch. If you've been following closely, this should already be done.
Run $ italc to bring up the teacher's iTALC interface.
Now, in the Client-Manager tab on the left, right-click in the list and "Add classroom", then "Add client":
- Name is only relevant to this iTALC interface and is how iTALC will refer to this particular client. It doesn't have to be, however I've just been using the client's hostname since the hostname we use is indicative of the classroom and workstation.
- IP/hostname is just that, either the client's IP address (only really useful if you're not using DHCP) or hostname (it's important that you have name resolution set up correctly to be able to find the if you're using hostname; we use WINS).
- MAC address is important for being able to remotely turn the workstations on (You can find this information by running
$ ifconfig and looking for the string labeled "HWaddr", it should look something like 12:34:56:78:90:AB).
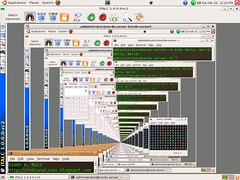
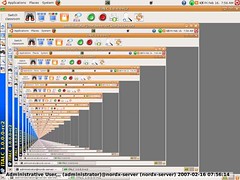
Now you should see a thumbnail of your own screen inside of the iTALC interface. Yay, recursion!
BE CAREFUL! If you spend too much time staring at the recursive effects of iTALC on itself, you might end up going a little loopy:

Play around with the interface a bit to get a feel for it, it's pretty intuitive.
Broken Functionality
I've yet to get the following functionality working quite right:
- The Login button does nothing. (Apparently it works for Windows clients, though)
- If the student account is forced to logout through iTALC, logging back in freezes the X server.
It's a pretty good product otherwise, and now that most of the functionality is working, I am looking forward to deploying it.


